Thursday, June 5, 2014

Summer Deco Dress #2: Complete! For reals this time!


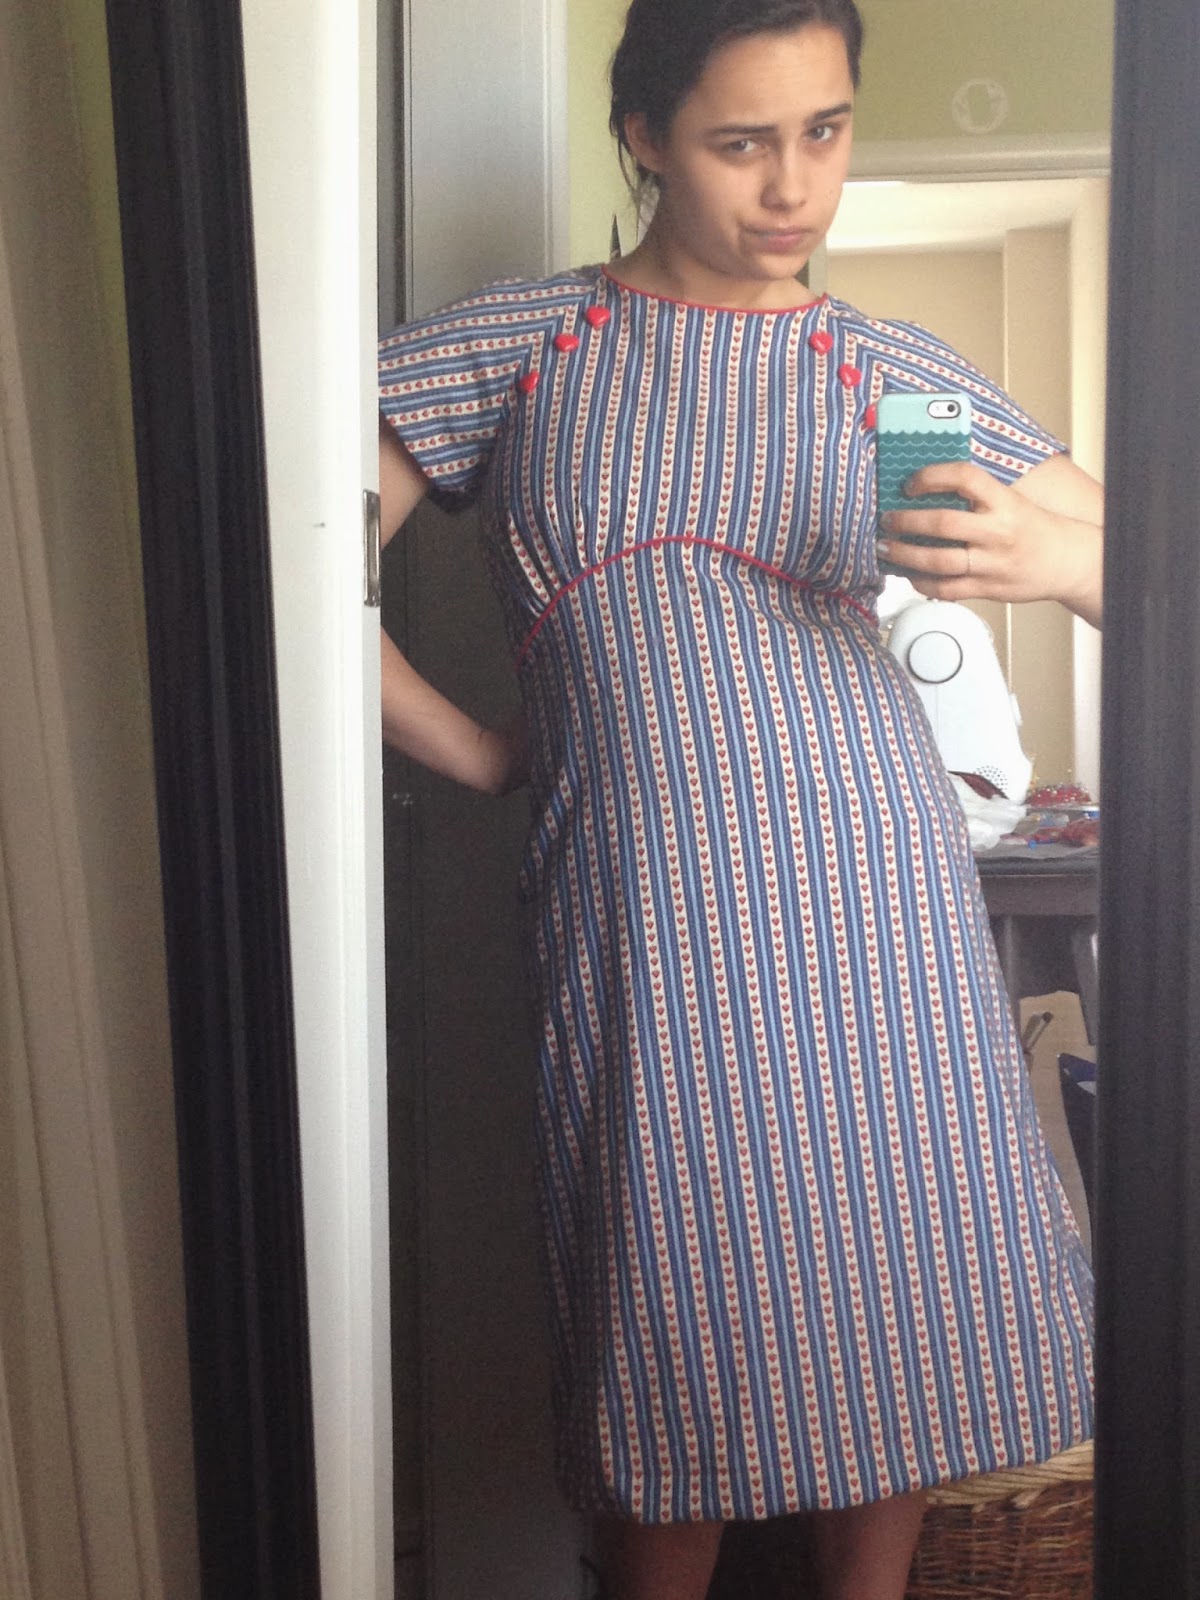
     Since my last Heart dress update, I made some changes. First, I wasn't sure about the buttons, so I tried some other ones I ordered off of Etsy that were bigger and darker. Here's the comparison:


     I really liked both, but the small ones just seemed to work a bit better. But I am still in love with the big heart buttons! They are the sweetest things. I will keep them for something special. 
     Nest, I felt like the waist needed a little "umph". A belt. Taking after the original Decades of Style pattern, I made a pointed split belt of a scrap of some old red cotton. I set the belt parts pretty wide to not disrupt the vertical fabric stripes in front. It's long in the back so I can tie it in a big happy bow! To brighten it up even more, I added two more small heart buttons at the points on the belt. And she was done!


     I'm really happy with it! I feel a little funny about the varying red tones of the materials, but I think it works. :) Another success!

Friday, May 30, 2014

Costume Mail Swag!


     I love it when mail comes for me! Especially packages! So exciting. I recently received two items I have been wanting for a while. A pattern from Eva Dress that makes me drool and a role of hoop boning from Etsy.
     The pattern is from the 1930's with slit sleeves and back. Can't wait to make it up. Eva Dress has tons of other awesome vintage patterns.
     The hoop boning is for my TV Grand Bustle pattern that I've had laying around FOR EVER! It was 12 yards for like $20, which beats any other sellers I've found. The shop is called "boning" on Etsy. Check it out.


There are two bodice options. I'm going for the one
with long sleeves.

  Over and out.

Summer Deco Dress #2: Heart Dress Complete?


     A couple days ago I possibly finished my 1930's Heart dress. I say "possibly", because I'm not sure it's as awesome as it can be. So, it's possibly finished for now. This is what I have:

Unsure mirror selfie.

Front

Back

Close-up 
Pretty heart buttons.

     So, I might change up the buttons. I found some that are still hearts, but there are visible button holes on the fronts. Next, I'm trying to figure out the belt. It's a split belt on the Decades of Style pattern, which I think I like. It wouldn't disrupt my careful stripe matching in the front... If I do a belt, I think it will be red like the buttons and piping and tie in a nice perky bow in the back. This dress is all about cuteness.

Sunday, May 25, 2014

Summer Deco Dress #2: The 1930's Heart Dress beginnings


     So, remember that heart and stripe fabric of amazingness that I ended up not using that I mentioned in an earlier post? Here's a refresher:

Amazingness.
     I decided not to use the New England dress pattern and instead use the 1930's Button Dress pattern, ALSO by Decades of Style. I decided to change patterns for a few reasons:
1. Boyfriend thought the 30's one was better
2. It's so much easier to match the stripes on the 30's rather than the New England
3. I want to wear it to the Gatsby picnic this year (and Gatsby is usually 20's and 30's)
4. I like the lines of this pattern! Kinda sexy...


     I've had this Button Dress pattern lying around for ages and actually used it once before long ago for my first ever 1930's dress. With that one I made certain alterations to the pattern and this time around I am doing some more alterations, just a bit different. 
     I am not a fan of the top tie in the back. It just seems weird to have a nicely tailored front and then funny ties at the back. Maybe ONE tie at the waist. But not two. So, I scrapped the top tie and raised the back. Next, I remember the waist seam not being at high when made up than it looks in the illustration, so I cut it a bit higher. Lastly, the bottom of the sleeves was a little too short to make a tidy hem, so I lengthened them. 

I made my mock-up from old bed sheets.

Cutting out the pieces.


     I don't know much about pattern matching, so I just aimed to get the front panels to line up with the stripes as I was cutting my fabric. Right now, I'm done with the cutting and I'm just sewing all my pieces together. Here's a picture of all the supplies for the dress together:

Woo hoo!


Thursday, May 22, 2014

Summer Deco Dress #1: Complete!


     So, what started as a mock-up from weird gingham fabric of the Decades of Style "New England Dress", well.... I just kinda went ahead and made it into the final dress. I chose the fabric originally because I didn't really care what happened to it, but the pattern went together so well with so few alterations that I just used it as a final. The results: (btw, my extremely tall sister took these photos, which accounts for the strange angle, but I love her for taking them for me!).


This is my "Deco-joy" face.

Can anyone tell that I didn't exactly take this photoshoot seriously?
Detail shots:


     I'm a total wimp when it comes to following legit patterns, because I usually just fudge patterning until it looks okay, so this was a test for myself. The pattern was pretty easy to follow and had satisfying results. I didn't change much. I just lowered the neckline about a half inch, took in the back shoulder seams an inch, and changed the zipper. 
     My only big gripe is that I find that Decades of Style mixes vintage and modern techniques that don't always translate perfectly. One example is that their patterns call for invisible zippers, which I've never seen on any vintage pieces I own. So, I just inserted a normal zipper. Maybe another problem I have with DoS patterns is that I have found the neckline a little too high on this New England Dress and the 1930s Button Dress. But those are just minor things. They still are great patterns. 
     I'm not so hot about my fabric choice. I usually don't go for this sort of thing, but maybe I'll warm up to it.
I like my buttons though. Just big plastic navy buttons. I like big, simple buttons. :)

Cost:
4 buttons: $1.80
fabric: free
thread: free
pattern: $23   +
total: $24.80        
   
     Not bad! If I don't count the pattern, the whole thing cost me like $2. Hell yeah. It's a good day.


Wednesday, May 7, 2014

1940's Summer Dress Plans


     I really have been wanting to get more into 20th c. fashion. I think it's beautiful, yet I have very little experience in it. I thought I should start from some patterns. I recently bought two from Decades of Style:


1940's New England Dress


1948 Siren Sundress

     I already have the fabric for the New England dress. I actually got it long before I ever knew what I was going to make with it. It just spoke to me and I snatched it up from my local fabric store's clearance section.

My baby. MINE.

     I'm going to get some big red heart buttons to go on the bib parts of the dress. Like these one from Etsy.

via Bohemian Findings

     I haven't found a fabric for the Siren Sundress, but I'm thinking something bright and cheerful like polka dots. I have a thing for polka dots...and hearts. 
     For the New England dress I'm making a test dress to make sure I get all the kinks out before I cut up my real fabric. I already know I'll have to shorten the waist and skirt (I'm petite and short-waisted). I'm using this poly-cotton blend of gingham-plaid-stuff. It's red and navy. 

Le cut out bodice pieces.

Le fabric close-up.

This is exciting!


Saturday, May 3, 2014

Violent Violet Neck Trim & Details


     I realized I didn't get into the details of the trim on my 1828 dress. Here's a little write-up.

     First, I had to make the trim pattern. I just fudged this. I traced the front and back shape of the neckline onto scrap fabric pieces, added seam allowances, sewed them together, traced the scallops on, and added seam allowances to them. It looked like this:


The part to the left is placed of the fold of the real fabric when cutting. 
I cut 1 of these in my plaid and 1 in the pink cotton, which serves as a lining to tack the hot pink piping to.
I carefully piped the scallops by hand, not trusting a machine with such tight corners. Then, I tacked the
piping down. Here it is mostly finished:


Underside. I had to piece the lining here, see that seam in the middle?

Front of trim.
Then, I piped the inside of the trim and sewed the whole thing to the neckline, folded it down to the inside and tacked the piping down to the lining.
   
Outside view.

Inside view. 
And I made a new bum pad! My old one (used for late 1830's through 1840's) was just too big for the earlier silhouette. The old one is on the bottom, new on the top. Both are stuffed with fabric scraps.


I only wore that little green bum pad and my corded petticoat under my dress, but I think I'll make at least one more petticoat for the next wearing. (Which will most likely be at Costume College!)

That's all for now!